|
Working with Projects
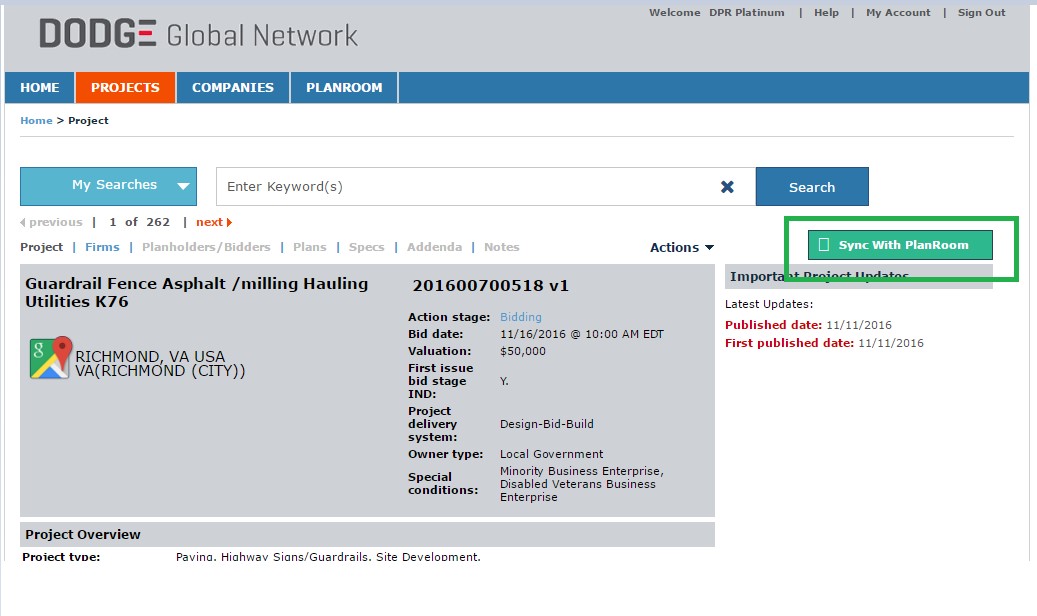
Transferring Dodge projects If you have a Dodge Global Network subscription, projects can be moved from the Network directly into Dodge PlanRoom.
In Dodge Global Network, when a project is ready to move from Network to the PlanRoom, select the Sync With PlanRoom button. The number of documents being transferred, among other factors, plays a role in determining how long the project will take. Transfers can take anywhere from 15 mins to 4 hours to process. Check back periodically in your PlanRoom tab to confirm that the project appears there.
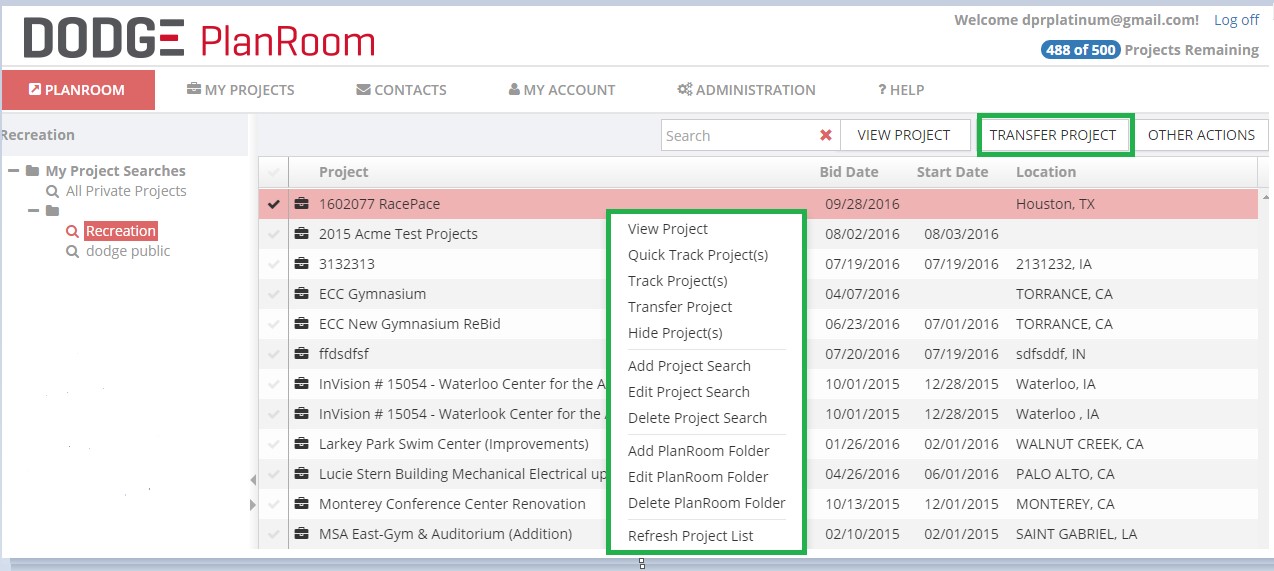
Once the transfer from Dodge Global Network to PlanRoom is complete, it will be found under the My Projects tab in PlanRoom. To view a project, right click on the project and select view project OR click the View Project button with the project selected. From the My Projects tab you can start inviting your colleagues and people outside your company to collaborate on the project and the bidding process as well as add relevant documents of your own such as site photos and safety documents.
WATCH VIDEO
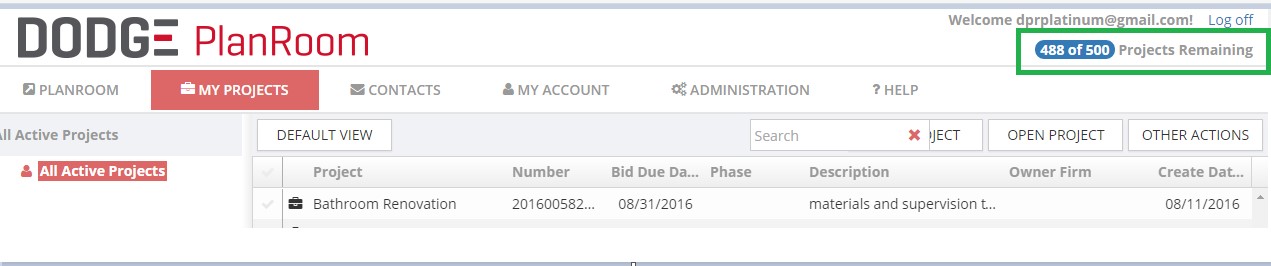
Dodge PlanRoom provides five active projects in the free version and up to 500 projects in the paid subscriptions. An active project is a project found in the My Projects tab. Projects from the My projects tab can be packaged and exported as an .OSX file for takeoff applications or sent out to collaborators by email notification.
In the My Projects area, begin by right clicking anywhere and selecting the Add Project button. The Project Name, Bid Date, Project Description, and Project Host are mandatory fields.
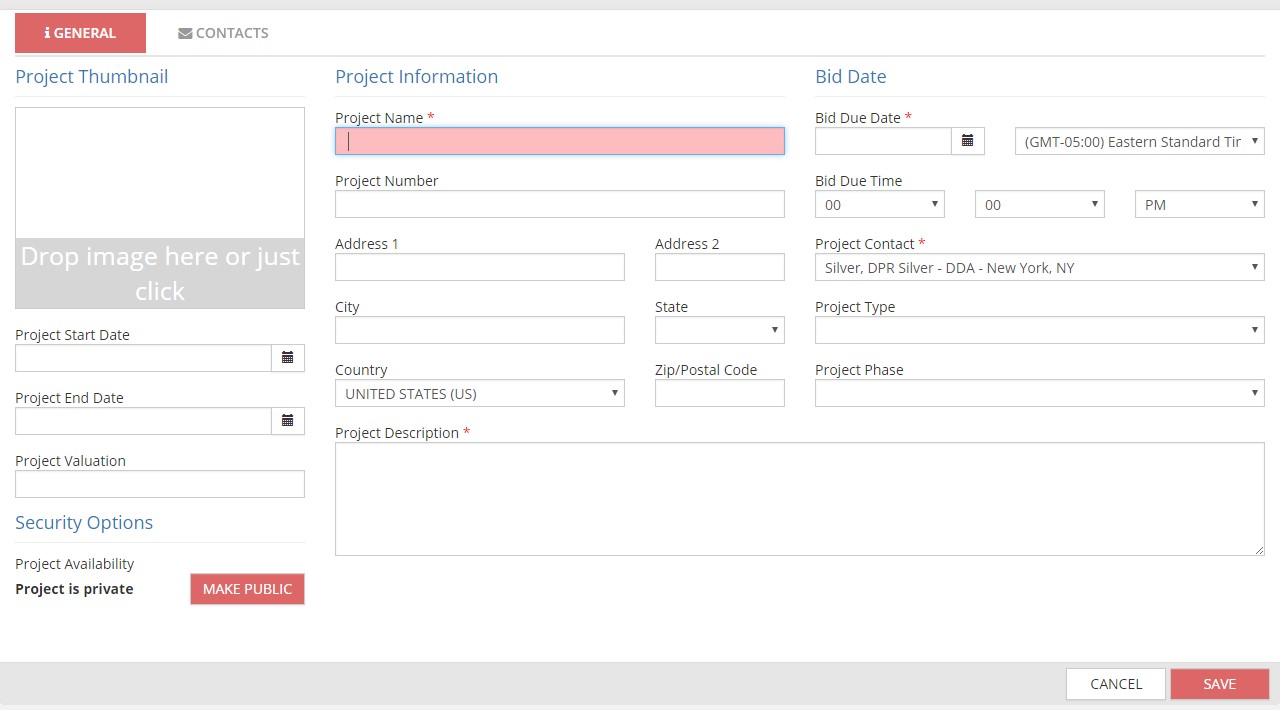
The other fields are not mandatory but additional information including a start date and address for easy search retrieval may make collaboration with colleagues and other resources easier. Projects details can be updated at any time.
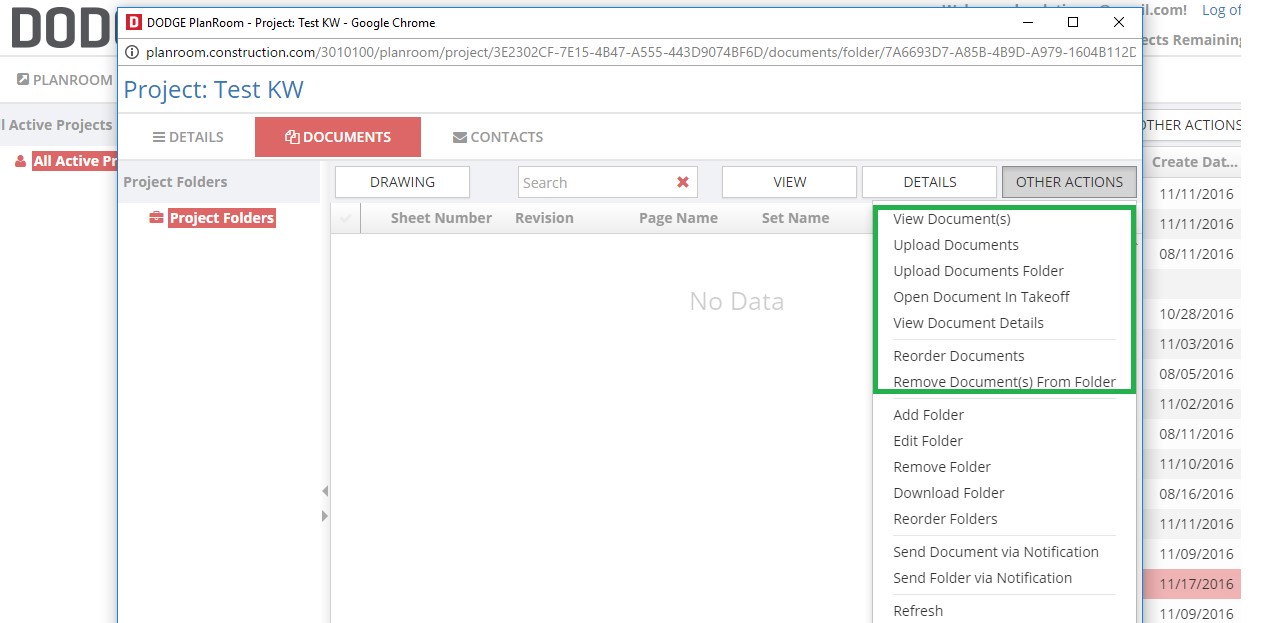
Once the Project Information details form is completed, click the Save button in the lower right corner and the project will become available in the My Projects tab. Double click on the project and click the Other Actions button to be brought to a screen where single documents or folders of documents can be uploaded. The application will provide a window to name the folder the first time a single document or a folder of documents is added. There is no limit to the number of documents that can be loaded in a single folder – but the upload process, and the process to prepare the documents for viewing takes up to 60 seconds. Select Refresh and see the documents turn from green to black. From this menu, documents can be removed or reordered as well.
The last step is adding contacts associated primarily to this project. Adding contacts here will allow them to be notified for this specific project and no other. Adding them to the Contacts tab in the PlanRoom will enable them to be available for any project. Click on Project Address Book to start.

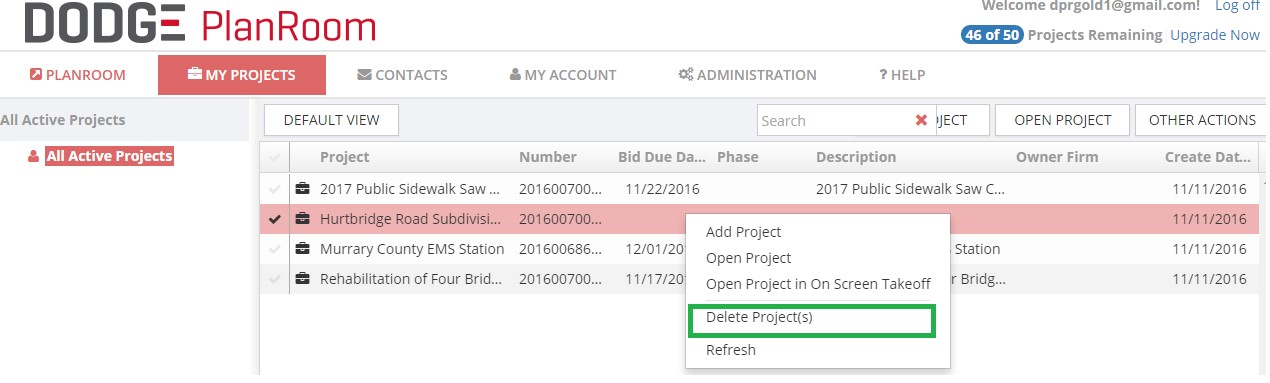
Contacts can be added to the project address book or you can segment out your contacts by trade, geography, or anything you prefer by creating a custom address book and adding them there. After adding a project, it can be deleted by right clicking on it and choosing Delete Projects.
WATCH VIDEO
WATCH VIDEO
In the My Projects tab, begin by right clicking the project you want to delete. Then select Delete Project(s) option.
|